Jurek and the Amazing Techno, Colored DreamWall

Jurek and the Amazing Techno, Colored DreamWall

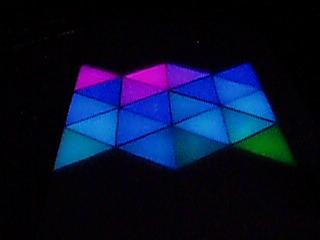
The title is mostly a placeholder, as I haven't really figured out a name for it yet. This project is a wall hanging that consists of semi-large triangular pixels using discrete RGB LED's and PWM to control intensity levels of each LED, resulting in a 4096-color display.

Tuesday, June 26, 2007

Lack of updates

Updates (or lack there-of)

Sorry for a lack of updates... It's been a very busy month, and I've not had a whole lot of time to work on stuff.

Things have finally started slowing down a bit now, so I've started working on a backlighting setup for a sign that Altered Esthetics has. I'm making it with foam core board, so I'm also using it as a test vehicle for how well this stuff will work.

Labels: ,

Friday, March 02, 2007

Snowed In (more or less)

No new updates or work this week, as two big snow storms each dump several inches on us. I didn't want to risk getting stuck in my little car, so I haven't ventured forth into white expanse.

Labels:

Tuesday, February 06, 2007

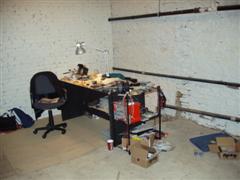
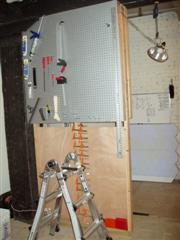
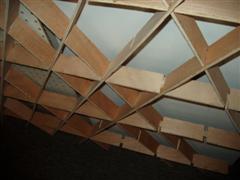
New Space pictures

Work Space
I finally got some pictures taken of the new space. I haven't been working on the wall, really, although tonight, I layed it on the saw horses and opened it up to double-check things.

I got a dividing/pegboard storage wall built last Monday, so I finally have someplace other than the floor to store my tools.
Tonight, I also cobbled together some overhead storage for wood, so I can keep stuff out of the way a little bit better. I don't have any pictures of that, but it's pretty basic. I made it out of a single 8' 2x4, so it's obviously not too complicated.

Anywho... here're the pictures. I didn't get a shot of the table saw, for some reason, but you probably get the idea. It's basically just to the left of the 4th picture, straight back from the white bucket in the corner.


Design & Planning
I started thinking about different ways to make smaller versions of the wall for cheap. I can use just a single driver board to make a smaller 20-pixel or even 15- or 10-pixel piece (or anything under 20, I guess, really).
I can make a nice O shape with 18 pixels (the center 6 forming a hexagon, missing), but construction might be an issue. T'wood certainly be something to have fabricated for me.

The other issue would be the processor. I've briefly started looking at other Atmel processors that are in a DIP package, and there are several (too many, it seems) available. If I would make something cheaper, the goal would be to make it as simple as possible, and computer interface (real-time, anyway) would not be a feature of it. Also, I would have to make it power-friendly enough so that a wall wart adapter could work.

Even if I use the same processor I did for the big wall (which probably costs ~$50-75 in parts, currently), I could probably get the cost down to maybe $1000 for the small 18-pixel O shape.

Anyone have any comments or ideas? I'd be glad to hear them.

Labels: ,

Thursday, January 18, 2007

New Space! (and fun with code)

Administrative/Logistic

Things have not been a complete stand-still in the (ugh...) 7 weeks since my last blog posting. What with the Festivus activities, cold weather, and burn-out-ness-y stuff, the last couple weeks haven't seen much activity on the wall.

However, that being said, things have happened.
Tonight, for example, I signed a lease and moved into a work space in Northeast, in the same building that the art show was in. I got me a wonderful 323 sq. ft. basement work area for all my dirty work.
I moved in my new table saw that I got for Festivus (yay), a bunch of woodworking tools, scrap wood & acrylic. I've got a lot to move in, including all my electronics stuff, and some shelving (most of which I will probably be making).
I will take and post some pictures once things look a little better.

Coding

I've also been working on some coding, in a much better sense than the C I had been working on before. I have been using Python & wx (a cross-platform graphics API akin to Tk, DirectX, or Quartz) to do a simulator/emulator/interface to the processor and wall.
Basically, I ported line-for-line the C code on the processor into Python, mainly to make sure I had to do as little debugging as possible. Once I got that working, I started refactoring the way the procedures worked, to make it more OO and maintainable.
The code isn't completely converted yet, but once I get it relatively stable, I will post what I've got for others to play around with.
I have also added one major thing I didn't have time to do (or probably EEPROM storage) for the art show: scrolling text. I made 2 different fonts, one of which only supports about 25 letters, digits, & punctuation, and the other supports the full alphabet, all 10 digits, and 10 punctuation characters. The problem with this font, however, is that the resolution of the wall only allows for about 2 characters displayed at any given time. The smaller font shows about 2.5 characters at once, as a comparison.

I'll be spending a bunch of time in the next week or two just acclimating myself and my work stuff to the new space, so expect at least a little progress!

Labels: ,

Thursday, November 30, 2006

Post-opening Update

The art show opening went really well. There were a ton of people there, and from what friends have told me, many, many people was awed by the wall. The visible damage along the top of the wall was out of eyesight (being ~9' high), so no problems there.

I will be talking with the landlord of the Q'arma Building tonight about possibly renting a small studio space. He has a few smaller (320 and 290 sq. ft.) studios that are relatively affordable, so I am going to be exploring this option for working on the wall. My current apartment isn't suitable at all for the work I need to do (cutting wood, etc), so this will hopefully work. The studios are in the basement and don't look pretty, but just need a work area, nothing more.

As you may have noticed, things have slowed down a bit. Relaxing at the end of a day is a welcome luxury after the last 2 months.

I have briefly started looking into the USB interface, and boy is that going to suck. I've found a book or two addressing the issues of USB interfaces to project devices (exactly what I have), so I will probably pick one or more of them up. It's a very complex communication method, especially since I have to write both sides. We'll see how that goes :|

Labels:

Friday, November 17, 2006

Show opens tonight!

Just a quick post here. The Level_13: Bonus Round show opens up tonight at 6:00pm. It will probably run until at least midnight, for those planning their evening.

The address is (in the Q'arma building):
1224 Quincy St. NE
Minneapolis, MN 55413

google maps
yahoo maps
new yahoo maps
mapquest

email me or call me if you need better directions or get lost.

Labels:

Show Update

Recovery
I took all of today (Thursday) off from work just so I'd have enough time to finish fixing the wall. It took me, in total, about 6 hours to completely do everything.
I tried using some superglue to fix the mashed wall section, but I doubt it did any good. The "wood product" used in this area is so porous, that the super glue just kinda soaks in and disappears. I taped it together for a while to let the glue set, and then just covered it all up with more aluminum tape. The final step was painting the outside. It took quite a bit of paint (relatively speaking), because like I said before, the wood is very porous without the hard markerboard surface, that it just soaked up much of the paint. In the end, the area was cleaned up pretty well. I felt like a plastic surgeon from the 1940's for war injuries. Just fix it up enough to function.
The acrylic was fairly easy to cut. 2 scores to get it to the "rough" rectangular shape, and then another 6 triangular wedges, with 8 scores, and the whole piece was completely cut.
The contact paper was pretty annoying, and I think it looks horrible close-up without the lights on, but you really can't see anything bad when it's 5 feet away and/or the lights are on. I didn't really have a whole lot of time to deal with trying to get it to look perfect, so I had to just leave it as it is.
I drilled 8 holes, 2 per piece of wood, for securing the mounting blocks to the wall, and used 1 1/2" #8 bolts to secure them to the wall. Hopefully, with those and the Liquid Nailz, it shouldn't come loose again.
The velcro took the bear's share of the time, at probably about 4-4.5 hours. It's a very tedious operation. Oh well, such is the way of things.
I then used 1" screws (instead of 3/4") to secure the mounting hardware to the wall, so that it actually goes into both pieces of wood.

After making all of the updates, I made the tricky decision of hanging it back up where it was before. I would be very, very surprised if the mounting brackets gave way again.

I took a small video of the wall in its mounting place for the art show. Here ya be (2.24MB QuickTime):


At this point, about all I can do is hope for the best. I will be at the opening tomorrow from maybe 6:30 or so until who knows how late.

That is all, signing off.

Labels: ,

Wednesday, November 15, 2006

Tragedy falls

It is with great pain and angst that I must tell you all that a certain tragedy has befallen the wall this evening.

After getting the wall hung (the top of it about 7' high) at the art gallery, I breathed a rather large sigh of relief. I helped with several other tasks, like hanging other pieces and moving some remaining boxes and materials from the old space to the new one.

At about 10pm, as I was on the computer picking some music to play, I heard a noise... a tear perhaps? a crash? I'm not entirely sure. I looked over in enough time to see the wall falling down onto the bookshelf below it, tilt forward, fall top-first onto the coffee table next to the bookcase, and finally land on the floor.
I immediately assumed the worst--that the wall was in several pieces and a complete loss. As I got over to it (covering 40 feet in the span of about 3 seconds), I noticed in my horror that all of the processor was still churning and the LEDs still seemed to be working. At least now I know that the boards can withstand a modest physical shock.

After surveying the aftermath of destruction, these are the casualties:
  • Disconnected mounting pieces of wood on the back of the wall. This is what failed. On the back, for mounting the wood, I used liquid nailz and glued together 2 1/2"-thick pieces of wood, and used 4 of these as mount points for hanging. Only 2 of these were used, and only 1 of them failed. We only used 3/4" screws, which never penetrated past the first piece of wood into the second. I don't know if the integrity of the other joint would have been comprimised at some point, either, if I would have used 1" screws.
  • Shattered top acrylic piece. It was completely destroyed, shattered almost all the way through vertically. Some or most of the velcro may be salvagable, however.
  • Top, middle pixel exterior wall collapsed. It's not entirely destroyed, but the marker board is "mushy" and severely cracked on the outside. Some tape, superglue, and paint should be able to fix it up well enough for Friday.
  • Broken top shelf on the bookcase. This is what took the initial blow and I think the main thing that saved the wall from being absolutely destroyed.
  • Shattered acrylic on the coffee table. This was a hand-made coffee table of my friend's, and the acrylic on the top of it, where the middle of the wall (the section that collapsed), landed from the bookcase. There was also a piece of moulding that was damaged, but I think a little paint will fix that up.
  • Scratches in the bottom piece of acrylic. These are relatively minor and won't be repaired at all.
  • Destroyed self-esteem, nerves, and well-being. I have quite a bit of work to do to remake the top piece of acrylic, with upwards of 12' of velcro to cut (and then into 3 1/4" strips after that). Hopefully, I can get some help with that on Thursday evening. For now, I just need to sleep on it and calm my nerves. I'm still a bit shaken up by it, now 2 hours later.
All is not lost, and things could have definitely been much, much worse. If we had hung the wall where we initially intended to, it would have falled about 6' straight down to the ground, probably destroying or severely damaging the power supply and/or processor, not to mention the shell itself.
I was actually somewhat surprised that the wall continued to function after the physical impact. Static electricity wreaks havoc on it, and even taking off the acrylic ("unzipping" the velcro) has caused the processor to freeze from time to time.

... I am the center of calm... I am the center of calm... I am the center of calm...

Labels:

Sunday, October 22, 2006

Mondo Update

LED Segments

I've gotten 20 more of these done! That puts me at 152/240, with 2 more needed for this first module. I will probably do them a little tonight and then finish them up Monday or Tuesday. After that, I can stop for a while (thankfully). My fingers are pretty sore and sensitive from the heat and metal.

Assembly

I had to remove one of the pieces of contact paper from one of the pieces of acrylic, because the velcro I had been using just wasn't cutting it (or, more precisely, was burning it from the hot glue). I bought about 30ft of self-adhesive velcro, 3/4" thick, and used a fabric cutting wheel to make nice, straight cuts along it (gotta cut it into thirds!). This works wonderfully, as the adhesive on the velcro is unlike anything I've ever seen. It stick amazingly well to basically everything.
Anyway, I got a new piece of contact paper put on the acrylic and spent a couple hours today putting the velcro on it. The first (bottom) piece of acrylic is now completely done and looks "OK". I say "OK" because there are still air bubbles randomly throughout it and a few minor holes. Not the best job in the world, but I'm now under a small time constraint (read below).

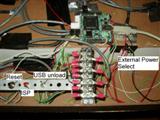
I finally got the processor board mounted to the wall, along with the different switches for reset, ISP, USB unload, and power supply selector. The only switch I have yet to mount is the main on/off switch. The switch I've been using isn't the one that I plan on using, so I haven't made a hole for it yet. Actually, I'm not sure if I will even use a switch right away. It's not entirely needed (the main power switch works fine) and especially not right away.

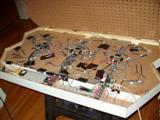
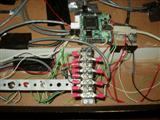
Here're some pictures of the guts behind the pixels (and man is it messy!):
InternalsPower SupplyProcessor MountProcessor Mount, with labelled switches


There're still plenty of wires to add, such as power & control cables for the "upper" 3 boards, as well as finalizing the cabling for everything. You can see in the overhead shot that there are orange, purple, and grey clip cables attached to random squiggly wires. These are the reset lines for the boards, and I'm going to be tying them to power directly, but I don't want to route the cables completely yet. Once I get all 6 driver boards working, then I will finish that step.


The processor and switches are mounted on the opposite side as the power supply, with enough room to take up the two remaining compartments (the angled compartment on the end is barely used).

You can also see the two fans (poorly) mounted for cooling. The one on the right blows into the area, whilst the one on the left blows out of it. They probably don't work too well, considering that there are large open areas for the air to simply escape through, instead of cycling the hot air around the power supply. I'm still not entirely sure how much cooling will be needed. I started doing some temperature measurements without the fans running, but the battery for my multimeter died, so I couldn't test any more. After about 3-4 hours of running 1/2 of the pixels in just 1 module at about 20% capacity, it rose from 74F to about 95F. Once I get everything running, I'll try turning all 120 pixels of module 1 on full white and just leave it there for a couple hours. If all goes well, it shouldn't get much above, say, 130F, which is still fine as far as I'm concerned.


I cut a small notch in the internal wall for the power supply source switch, which fit nice and snug in there. It's currently only being held in by duct tape (I don't think "duct tape" is even used by HVAC technicians on ductwork), but that can be "enahanced" with glue later. The other 3 main switches are all mounted on a simple strip of galvanized hanger strap. The large holes worked perfectly for the threading, and it's stable enough for what I need.
The large terminal block looks very similar to the one next to the power supply (which is used for power!), but is for the TWI bus. This seemed like the most effective method of breaking out the bus from the processor to the 6 boards that all require the same signal.

Coding

I've begun coding up a few basic tranform functions to apply to the wall. Currently I have:
  • Inversion (inverts the colors of all the pixels... red -> cyan, black -> white, yellow -> blue, etc)
  • Shift up/down/left/right (shifts all pixels up/down/left/right 1 row)
The inversion can be enhanced to only invert certain channels (e.g. only the red channel)
The shifting functions can either roll over the shifted-out pixels, or just shift in a blank (black) pixel.
If you combine "shift up" with "shift left", for example (or "shift down" with "shift right"), then you get a tranform that shifts all pixels along the upper-left/lower-right axis (there are 3 axes with triangles, not the normal 2 with rectangular ones!). Likewise, combining "shift up" with "shift right" (or "shift down" with "shift left") translates the pixels along the upper-right/lower-left axis.
Simple, but powerful stuff.

Other potential transform functions are
  • Average (averages the surrounding 3 or 12 surrounding triangles)
  • Rotate (rotates the pixels 60 or 120 degrees about a given pixel)
  • Fade (slowly fades the pixel from its current value to black (or white, or any given channel!))

I managed to find, in the documentation, the status bits for controlling the speed of the TWI bus. I think, by default, the transmission speed is set to 62.5 kHz. By setting the speed bits to the fastest setting (266.6 kHz, a 4.3x speed increase), I was able to increase the framerate of the wall by about 50%. This was a very welcome change, indeed. Hoo-ray!


Announcement

Some of you may have been wondering why there has been a huge bump in the progress in this project over the last 2 months. Indeed, I've put in 27 hours this previous week, and 85 hours since September 1st. Well, there is reason for this, and quite an exciting one (for me, at least).

Now that it's official, and I've committed myself time-wise for it, I feel I can mention that the "technowall" (NOT the official name!) will be part of the upcoming (Artist's reception/opening is on November 17th) video game art show at Altered Esthetics: "Level_13: Bonus Round!". Their address at the time of the show is:

Altered Esthetics
1224 Quincy St. NE
Minneapolis, MN 55413

This is just off Broadway and Central; for those that need directions, please consult your favorite mapping website. If you need more information than this, please contact me.

I will only have the 1st module done, and won't have any computer interface ready, but I will be spending a fair amount of time with coding to get various random (and not-so-random!) patterns working. The pseudorandom seed switch (see the October 10th post) should keep everything random enough for my needs.

I have already designed several patterns, as well as a few other neat designs, with more to come (hopefully). If anyone wants to try their hand at designing something, here is a PNG template that I've been using:
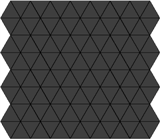

Please email any creations to me! I'd love to see people's creativity with such a small (and oddly-constrained) resolution!

Exciting news!

Labels: , , ,

Saturday, October 07, 2006

Pretty Colors!

Assembly
I made some more good progress today. I got 20 of the pixels glued into place (the first driver board I was testing with Thursday). This means a far better color mixing than Thursday's video had. As you can see by the first video (4.2MB), there are really very few hotspots at all and you have to look hard to find them.


The second video (3.4MB) was a request by someone who wanted to see the LEDs in action without the diffusing acrylic. It still looks pretty neat and gives a bit different of an effect. Maybe I can make 2 different tops, one that's the standard acrylic with contact paper and another that's either clear acrylic or slightly-buffed/sanded.


Coding
Yes, I actually have made a small amount of progress in the coding department today. There were a couple bugs and inconsistencies with the way I was coding everything up. I wasn't able to address a single driver chip individually, so I was seeing some rather odd side effects whenever I tried.
The main issue I tracked it down to was P0 (one of the I/O busses) not working at all on either the starter kit board, nor my own board. Perhaps there's a processor register setting that I'm not doing to get these ports to work properly; I'll have to dig through the manual.
As is evident in the videos, I am quite able to address each driver chip individually.

Miscellaneous
I also tested to see how white "white" is, and it's rather sad and abysmal. On most pixels, it's quite pink (red is overpowering), and in others, it's purple or blue (green is underpower). It's a little late in the game to fix this, so I guess I'll just have to live with it. Oh well... :/

Labels: , ,

Tuesday, September 05, 2006

Site update

I forgot to mention a few minor site-related items in my last post.


I've topped 1000 hits! Wow, that's low traffic volume. 1000 hits in about 16 months. wooo anyway, I guess


I've added a small item to the sidebar, "random math problem". These are picked at random and vary from moderately-easy to "I haven't solved them yet". I'm not saying that I'm a math genius or anything, but these are all from some math classwork I did back in 9th grade. More than a few still leave my head scratching, even though I'm now able to solve about 95% of the problems.

Anyway, for the answer, you should be able to mouse over the problem and have a box pop up that says "Highlight for answer". I made the text color the same as the background, so that if you accidentally mouse over the box, you don't reveal the answer. To see the answer, just click-and-drag over the box to highlight the answer. Most of the answers are purely numerical and often are just a single number.

Yay random time wasters.

Labels:

Monday, September 04, 2006

Finally Moved In

So I've finally gotten moved in (2 weeks ago, even) and mostly have my workbench set up again. It's a slightly slow process, as anyone who has moved many times can attest to.

Acrylic
Before I moved, I managed to get one (of two, per module) of the 0.093" pieces of acrylic cut. It went fairly easily, which I was glad for, and it looks pretty good. I'm still trying to figure out how it will attach to the wall. I don't really want to glue it on, sealing all of the pixels, and I can't have any nasty hinges on the sides. My current thinking is to have long, thin bolts that go all the way through the wall floor. They will need to be 2.25-2.5" bolts to be able to do this. Any ideas are certainly welcome.

Alumin(i)um Foil
I decided to buy some aluminum tape instead of trying to wrangle with aluminum foil. The stuff I found fits perfectly. It's 2" tall and is the exact height of the inside of the pixel walls. I tested putting pieces on one of the pixels and it went together very easily. I used 2 wooden dowels/chopsticks to help position and place the tape and get it affixed in the corners. My fingers are far too fat to get into the corners of those 60 degree angles (not that I have fat fingers). I am quite happy with the results.

LEDs
I still have yet to find/buy a hot glue gun. I know fabric & craft stores have them, but I just haven't gotten over to one to pick up a gun yet. I don't know why I didn't think of hot glue before; screw epoxy, super glue, and caulk.

Hopefully this week, I will start working on stuff for real again. It's been far too long :|

Labels: ,

Thursday, August 10, 2006

No New Posts

I am in the process of moving (I'm moving on the 19th) and won't be making any posts before then (and probably for a few days after too). I might be working on the project some time between now and when I get internet access again, but there won't be any posts.

Labels:

Saturday, April 08, 2006

Slow week

Yeah, yeah... sorry about no updates. This week has been a little busy for me and I didn't have a whole lot of time to work on anything until today.

LED Triplets
I've finished the batch of 14 I was working on, so now I'm up to 30 of 240 done (12.5%).

Miscellaneous
Now that I have at least 20 LED wire segments, I'm going to stop working on construction and soldering for a bit. I need to verify that the TWI and the driver boards work correctly. The boards each have 4 driver chips and each driver chip can drive 5 pixels, so that gives me 20 pixels per driver board.
So all of my work for a while will be coding and wire crimping (not a whole lot of this).

Once I get the communication working properly, then I can continue on with everything else.
Hopefully, there won't be any major snags. I am prepared for one or more of the chips and/or boards not working properly, but if none of them work, then I'm going to have a lot of testing and re-engineering to do.

If all goes well, I'll have some nice, pretty movies of everything working properly in a week.

Labels: ,

Monday, March 27, 2006

New Website

OK! here we go!

Pictures!
From Tuesday the 21st:
13 wall pieces, assembled as much as they will go:

View showing the slots and joints of the wood pieces:

Head-on view showing the joints and the gaps between the 3 pieces:


More pictures will come now that I've got one whole section completely assembled and glued.

A single LED triplet, 100% done and ready for usage:


Note that there are currently no real markings on the cables to denote red, green, blue, or common power, but the header is marked with an arrow that I used to signify the common power.

Labels:

Tuesday, March 21, 2006

Update

Construction
I made decent progress over the weekend using the new method. I completely cut up a 2'x4' piece of plywood (1/4", I was able to find some 1/8" stuff so I can go pretty thin), making 13 pieces. 11 are 44" long (the width of the wall) and 2 are 22" long. If you do the math, there's not a whole lot of material left over as waste (48 sq. in. total, out of 576 sq. in., which is 92% utilization).
For the internal walls, I need 54 pieces:
  • 24 @ 44"
  • 6 @ 38.5"
  • 8 @ 33"
  • 8 @ 22"
  • 8 @ 11"
So in overall lengths cut, I am 29% done. In pieces cut percentages, I am 24% done. Again, because of time and noise constraints, I really can't work on it any more until the weekend.
While I was building and testing the strips of wood, I felt nostalgic about the balsa wood dinosaurs that were popular in my youth. I had about a half dozen of them myself and several of my friends had many more than I. Anyone else remember those?

LEDs
I have completely soldered 2 LED triplets (out of the 240 I need), complete with inline resistors, and terminated with a 2x2 header socket. They each took me about 30 minutes to do, but I'm still refining the procedure for doing them, so the time per LED wire will probably drop slightly. Each LED triplet has:
  • 3 LEDs (red, green, & blue)
  • 3 resistors
  • 13 soldering joints
  • 11 pieces of heatshrink tubing
  • 3 twisted pair cables
  • 1 4-conductor cable
  • 4 crimp connectors
  • 1 4-pin socket

Website Updates
I would normally have included pictures with this posting, but the friend that is lending me server space and bandwidth for pictures (evilducks.net) changed hosting companies and hasn't set up an account for me to upload files yet. Pictures will come!

I have added some lame bargraphs on the sidebar to track progress of various aspects of the project. These will be updated whenever I make progress, not only when I make a blog posting. Hopefully, this will help slightly with motivation. We'll see.
I have tried it in Opera, FireFox, and IE. It works properly in Opera and FireFox, but the bars don't show up in IE. Stupid IE. I'm not a web expert, so I don't know how to fix it so it does. If anyone knows CSS well enough to take a look at the code, let me know and I can send you the template to look at. (Or if you can discern it just by looking at the HTML, then by all means go ahead and try and let me know!)

Labels: , ,

Monday, February 20, 2006

Miscellaneous updates

Bookkeeping
I've added a bookkeeping .xml file to the site, so everyone can see exactly how much money I've wasted on this glorious hobby. It is under the links section.

"Other"
I bought some flashing today and a metal scissors to cut it with. I have yet to test it out; I will be doing that shortly. The idea is to use the flasing as a barrier between the 15 pixels (or 30 in the double row) of a row. Then in order to compensate for the pixel wall thickness differences, I plan on painting/coloring/etc the inside of the acrylic to be the correct width. This will also give me a little bit of slop for positioning the flashing, as I don't need it to be exactly on the pixel line.

Yay progress!

Labels: ,

Thursday, February 16, 2006

Hoo-Ah! SpokePOV & uC board

Spoke POV
A friend was borrowing my digital multimeter, so I couldn't use it to test any of my soldering while working on the Spoke POV kit. In the kit, there are:
  • 60 LEDs (2 leads each)
  • 1 20-pin socket
  • 1 8-pin socket
  • 8 16-pin IC's
  • 1 3-pin sensor
  • 1 4-pin switch
  • 2 10-pin headers
  • 4 2-pin battery clips
  • 5 resistors (2 leads each)
  • 8 10-pin resistor networks
  • 1 25-pin DB-25 connector

For those of you doing the math at home, that's 426 through-hole leads to solder without a continuity tester. I flew through everything with relative easy; I was having a harder time aligning all of the LEDs to be straight than I was with any of the soldering. I didn't even need to use my binoculars to do it! It took me about 2 hours or so to solder everything up on both the dongle and the main board and then I crossed my fingers and plugged it all into my computer. Huzzah! Success on the first try.

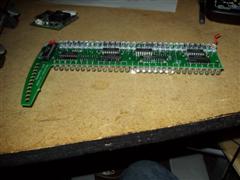
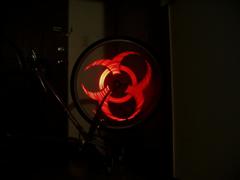
Board:


Action Jackson shot:


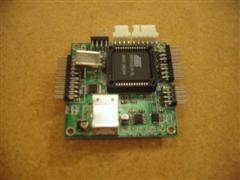
Microcontroller Board
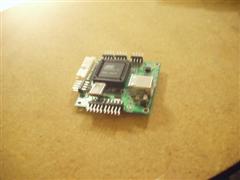
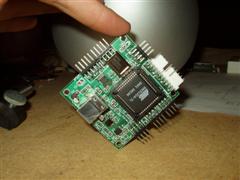
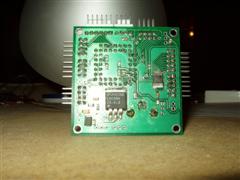
I got bored last night and decided to finish soldering the few remaining components onto the microcontroller board I left unfinished some 5 months ago. I had to solder on a resistor, 2 capacitors, 2 ADC chips, the CPU socket, the USB connector, and 8 headers. It all went fairly smoothly and I was a little surprised that I hadn't lost the soldering touch yet. Yay me. I still didn't have a mutlimeter to test when I did this, which is slightly scarier considering the ADCs are 16-pin chips with 0.65mm pitch (a hair wider than 25mil pitch). Anyway, I got a new multimeter shipped today and I did a quick test of the pads and everything seems to have worked out OK. Anywho, here're a bunch o' pics:


Labels: ,

Wednesday, February 08, 2006

Preparation time

I spent some time cleaning off my work area the other day. It was beginning to become infested with legos and various other small projects' paraphernalia. I'd say that at this point, it's about half ready to be used again. I have some ideas about building some storage shelving on the underside the desk (it's just a couple pieces of chip board, basically, so there's a lot of room for improvement) so I can offload some of the tools and storage bins that have no real good place to go yet.

I have also ordered up a little side project for coolness' sake and to see if I can kickstart my interest in the electronics side again. This site is for a bike LED POV project and she has everything you need to make it except the tools and solder available to buy. It's fairly cheap, at around $50, so even if it doesn't work (I fully expect it to work, though), I won't be out a big chunk of money.

Labels:

Monday, August 29, 2005

wait!

This project isn't dead!
I swear!

Labels:

Friday, June 03, 2005

Soldering and code update

Sorry for the delay in posting... It took me a day or two to get back into it after my vacation.

Vacation Report

Budweiser has this billboard in Times Square in Manhattan that uses triangular pixels. I didn't even know it existed until this last weekend when I noticed it there. It was on the south end of the 7th Ave/Broadway intersection, right below the Cup-o-Noodles billboard.
The triangle orientation was rotated 90 degrees compared to what I'm planning on doing and it had about 3 times as many pixels as mine (its width was about the same as the height for mine, but its height was about 3x my width... in raw pixels that is, not dimensions). Unfortunately, it was a Budweiser ad and the only colors they ever used were red, white, blue (for the flag, of course) and tan (for beer and foam, along with white). I was really hoping to see other colors from it, but alas... that was all.

When I went back to look at it at night, I noticed that each of the pixels was made up of about 50 or so smaller pixels. I couldn't tell if the subpixels were rectangular or triangular, but I'm willing to bet that they're rectangular. There were a rather large number of the subpixels that had one or more of the RGB component colors blown out. For example, magenta where it should have been white, indicating that the green component was blown. Still, it looked really awesome from a technical standpoint (I really couldn't care less about the actual content of the ad).


Soldering

I got my new soldering iron and it works wonderfully. Wednesday night, I tried it out and I was amazed at how much easier the 1/64" (about 15 mils) tip was than the 50-mil tip I had before (imagine that). I was able to solder 2 driver chips onto 2 adapters without much problem. That being said, I still have some room for improvement. The first one I soldered had WAY too much solder on it and I had to use wick across all of the pins just to pull enough out. In the end, the worst cross-pin resistance I had was in the low MOhms. The second one faired much better (although I still had too much solder) and the cross-pin resistance increased an order of magnitude. Hopefully, by the time I actually start soldering the driver chips to the board, I won't get any resistance at all.


Coding

I spent the better part of this evening working on abstracting out some common tasks on the code to deal with programmatically setting pixel values better. At this point, I can call a function when I want to set any single register on a particular driver chip and I have a decent amount of automation in place for the 8-register writing necessary for all 15 LED intensity values.

I noticed that the code I had running before was resetting the driver chip each time it was writing out the intensity values, so by removing that code from the infinite loop, I was able to speed the code up immensely.

Currently, I have 2 driver chips hooked up and I can access each of them individually and assign a color to a particular pixel with relative ease.


I think I'm ready to lay out the driver chip board (should be easy... a header or two... the driver chip... and a couple of resistors) and possibly place an order on them. Progress continues!

Labels: , ,

Tuesday, May 03, 2005

mini-rant

OK, so about a week and a half ago (4/21), I ordered some LED's, an LED tester, and some other miscellaneous crap from this Hosfelt Electronics place in Ohio. Later that day, someone from them called me to say that one of the parts I ordered was out out stock and if it would be OK to hold the rest of the shipment until that part came in, which she said would be "early next week." I said OK, since I still hadn't gotten my uC starter kit or any of the other components yet. Now today (5/3), I emailed them (no response yet... 12 hours later) and they haven't charged my credit card yet, which means they obviously haven't shipped it yet either. No status updates. No phone calls. No emails. Jack Shit. ugh....

I've started a spreadsheet of all expenses for this project. At some point, I will probably be posting it here, for those that are interested. Currently, the running total is around $260 (half of that is for the uC starter kit). I expect this project to cost anywhere from $1000-3000...
And, just for the record, yes, they did inspire me to start this project. "Nice idea", but disco? c'mon...
Anyway, enough of the inspirator bashing. In reality, I just wanted to make something that was different from that. Square pixels were boring to me. I really didn't have any interest in a "floor". I don't think I can really afford ~512 pixels... (no, I'm not in college, and no, I'm not living on the street... but there's just 1 of me). Perhaps, I can design it to be modular enough that I can add on to it at a later time.

Labels: ,